Gaskets:
Every engine contains gaskets and seals. With the help of gaskets, two parts of the engine can be mounted against each other. Both parts can be made of cast iron, but also plastic on iron. Depending on the type of material of the engine, a paper, aluminum, or rubber gasket is installed. Sometimes a layer of sealant is also applied which serves as a gasket.
Below is an overview of all the gaskets of a cylinder head of a Lexus RX300:
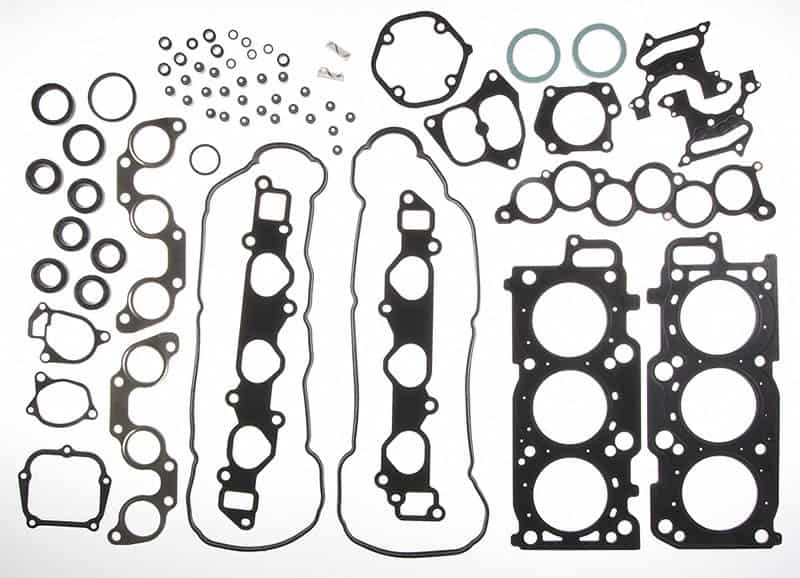
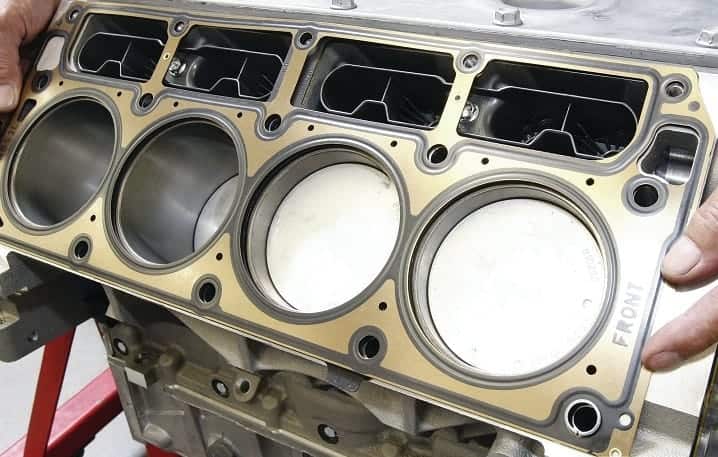
The cylinder head gasket (usually referred to as the head gasket) is the gasket that endures the most stress. The head gasket is installed between the rotating part of the engine block and the cylinder head. With each power stroke of the engine, the piston is pushed downward by the combustion force. This combustion force acts against the cylinder head because the space between the cylinder head and the piston must increase as the piston is moved down. The head gasket is situated between the two engine parts and ensures that combustion gases cannot escape from one cylinder chamber to another. The head gasket also provides a seal for the oil and coolant passages running from the engine block to the cylinder head.
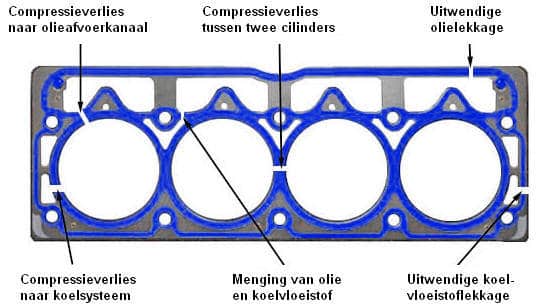
A faulty head gasket can be recognized in various ways:�a0recognized:�a0
- There is a mixing of oil and coolant because the gasket between both channels is torn.
- Smoke comes from the car’s exhaust because the head gasket between an oil or coolant channel and the cylinder is torn.
- There is visible oil or coolant loss (external leakage) on the outside of the engine block because the head gasket is torn at that spot.
- There is a loss of compression because the head gasket is torn between two combustion chambers.
There are also several causes for the above-mentioned defects, as oil and coolant mixing can also occur when the heat exchanger is internally cracked. Exhaust smoke can also be caused by faulty piston rings or defective valve seals (blue smoke), or white smoke due to a crack in the EGR cooler or the cylinder head (coolant). A loss of compression can also have many other causes. Now it has been made clear how much “responsibility” the head gasket holds for the functioning of the engine.
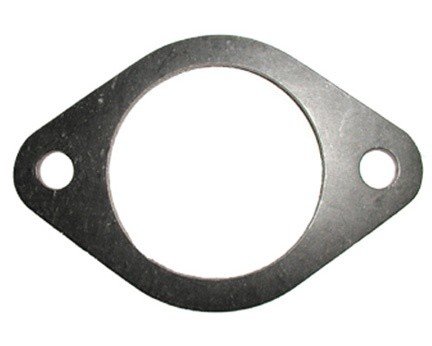
Gaskets between parts have one important task. That is sealing. In the image, a gasket can be seen from an EGR line.
In the space between the EGR valve and the EGR pipe, this sealing gasket is installed. The exhaust gases flow through the large hole and cannot escape thanks to the gasket. With the help of 2 bolts, the EGR pipe is mounted onto the valve, and the gasket is clamped.
Because the gasket is clamped, it will form on one side to the valve and on the other side to the pipe. This is not a problem when it is mounted, as it ensures even better sealing. When the parts are disassembled, however, it is important to replace the gasket. When it is reinstalled after disassembly, the chance of leakage is very high. Especially if the gasket is turned over, the deformation of the material will certainly cause problems. When engine parts are disassembled (think of exhaust parts, thermostat housing, intake manifold, etc.), the gaskets must always be replaced.
Seals:
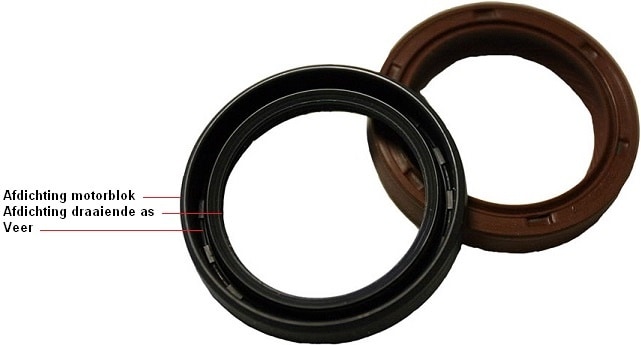
There are many rotating parts in the engine. Sometimes the rotating parts are visible from the outside, such as the pulleys of the crankshaft and the camshaft. To ensure a seal between the rotating parts and the engine block, seals are used (see image).
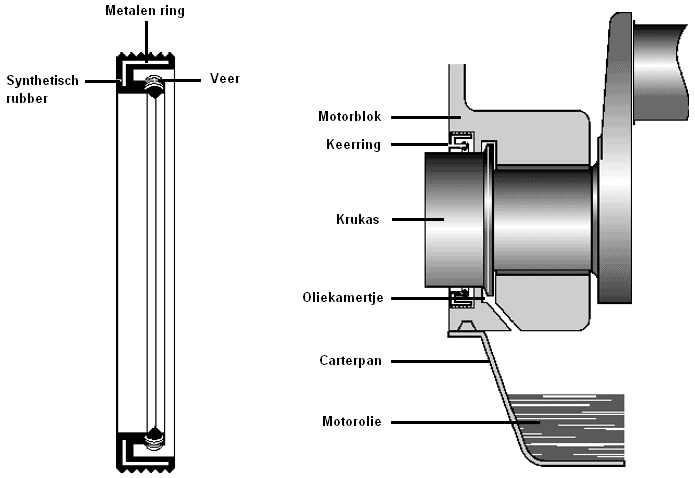
The outer side of the seal ensures sealing against the engine block, and the inner side against the rotating shaft (e.g., the crank or camshaft). There is a spring inside the seal. This spring utilizes the elasticity of the seal; the inner side is pressed extra against the shaft by the spring.
In the image below, a crankshaft seal is shown. It is clearly visible how the seal is positioned between the engine block and the crankshaft. In the engine block, there’s also a small oil channel leading to the seal. Through this small oil channel, the engine oil can reach the oil chamber. Through this small oil channel, a small amount of oil can get between the crankshaft and the rubber of the seal. This prevents the rubber of the seal from getting damaged as the material of the crankshaft rubs against it. The crankshaft has a seal at both ends; at the front (often the timing side) and at the rear (where the flywheel is mounted).
Replacing the seal sometimes requires a lot of work. When the crankshaft seal on the flywheel side leaks, for instance, the entire transmission and clutch with the flywheel must be disassembled. The crankshaft seal on the other side, often where the serpentine belt and possibly the timing belt are located, is easier to reach. The old seal can often be tapped out with a screwdriver and a hammer. Be very careful not to create scratches. The scratches will not be sealed by the new seal, which will certainly lead to oil leakage.
The new seal is often delivered with a piece of auxiliary tool. This is often a plastic cap on the inside of the seal. This plastic cap provides a certain pre-tension on the spring inside the seal, making the seal easier to install. During installation, the seal must be greased with lubricant or oil, otherwise, it can get damaged during installation. Damage to the seal will obviously also cause leaks.
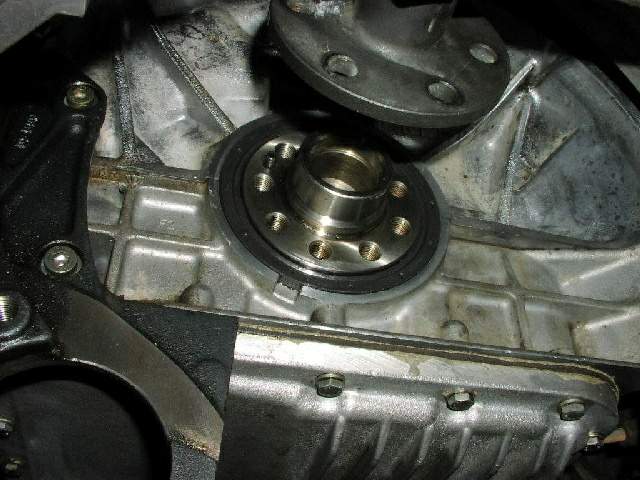
In the two images below, a crank flange with and without the crankshaft seal can be seen:

Related page: